

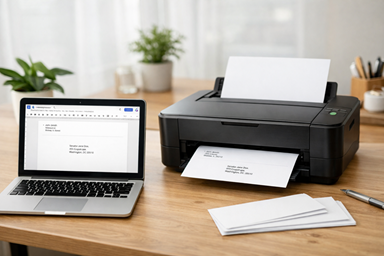
If you’ve ever tried printing envelopes at home, you know it can feel more complicated than it should be. Between sizing, alignment, and printer settings, it’s easy to waste a few envelopes just getting things right.
The good news is you can skip most of that setup work by using a pre-formatted Google Docs template. Once it’s set up, printing #10 envelopes becomes quick and repeatable.
Here’s how to do it.
Step 1: Use a Pre-Made Google Docs Template
Instead of starting from scratch every time, create (or use) a Google Docs template that’s already sized for a standard #10 envelope (4.125″ x 9.5″).
Link to the #10 Envelope: https://docs.google.com/document/d/1uRBiMfzoji-r3cZVZKMFuov_UvteM7_LVdgBmYkh9OE/edit?usp=sharing
Once you open the link:
Click File → Make a copy
- Rename it based on who you’re sending the envelope to
Now you’ve got a version you can edit without messing up your original template.
From here, just type in:
- Your return address (top left)
- The recipient’s address (center area)
That’s it. No resizing or formatting needed.
Step 2: Save Copies for Repeat Use
If you regularly send mail to the same people or organizations, this is where things get even easier.
After you create an envelope for someone:
- Keep that document saved
- Name it something recognizable (like “IRS Office” or “Senator Contact”)
Next time you need it, just open the file and print. No retyping. No adjusting alignment again.
If you send a lot of letters to government offices, clients, or vendors, or the recipient this small habit can save you a surprising amount of time.
Step 3: Check Your Printer Settings (This Matters)
Before you print, take a moment to double-check your settings. This is where most mistakes happen.
Make sure:
- Your paper size is set to #10 envelope in the print dialog
- Your printer software/settings also match #10 envelope
- The envelope is loaded correctly (this depends on your printer)
Every printer is a little different. Some want envelopes face up, others face down, and the orientation can vary.
If you’re unsure, do a quick test print with one envelope first. It’s better than wasting a whole stack.
Step 4: Print and Adjust if Needed
Once everything is set:
- Print one test envelope
- Check alignment
- Make small adjustments in your document if needed
After that, you’re good to go.
Why This Method Works
Using a Google Docs template removes the most frustrating part of printing envelopes: setup.
You don’t have to:
- Re-enter custom page sizes
- Guess where the addresses should go
- Fix alignment from scratch every time
Instead, you:
- Open your template
- Make a copy
- Type the address
Simple and repeatable.
Final Tip
If you plan to use this often, build yourself a small library of saved envelope files for people and organizations you contact regularly.
It turns a 10-minute task into a 30-second one.
Questions or comments
